- Install the OSS version of the Heartbeat Client.
curl -L -O https://artifacts.elastic.co/downloads/beats/heartbeat/heartbeat-oss-7.1.1-amd64.deb
sudo dpkg -i heartbeat-7.1.1-amd64.deb
Point to proper version as needed, the example above uses version 7.1.1. It is crucial that you install the OSS version, if you use the regular version, you will get the following errors from the Heartbeat Client:Connection marked as failed because the onConnect callback failed: cannot retrieve the elasticsearch license: unauthorized access, could not connect to the xpack endpoint, verify your credentials
Configure the configuration as needed (/etc/heartbeat/heartbeat.yml), setup the endpoints that needs monitoring, point output.elasticsearch to the AWS ES VPC endpoint.
Do not forget to add the following to heartbeat.yml
setup.ilm.enabled: false
Failing to do so will cause the following:Connection marked as failed because the onConnect callback failed: request checking for ILM availability failed: 401 Unauthorized: {"Message":"Your request: '/_xpack' is not allowed."}Once done, start the service.
sudo heartbeat setup
sudo service heartbeat-elastic start
- Setup the Heartbeat index in Kibana.
Go to your AWS ES Kibana Page -> Management -> Index Patterns and hit "Create Index Patterns". Type "heartbeat-*" in the index pattern and setup the index as needed. The output will be similar to the following:

-
Now you can setup Visualization from the Heartbeat index.


2/20/2020
Using AWS ElasticSearch Service with Heartbeat (Uptime Monitor)
AWS ElasticSearch Service do not have the Uptime App, but it is possible to point a Heartbeat client and point it to AWS ES Service to monitor site uptime. Assuming you have AWS ES up and running, just do the following:


5/03/2010
Using PHPXref
PHPXref is a PHP cross referencing documentation generator designed to make it easier for developers to browse a PHP application's codebase. With features such as mouse-over information and hot-jumping among classes and functions and extraction of phpdoc style documentation, it really does simplify a job of a developer in getting to know a new application.


It requires Perl to be installed since it uses a perl-based script to parse the source directory to generate a documentation. You may download the right version of Perl for your platform here.
Using PHPXref to generate a cross referencing documentation of any application is easy, assuming you already have Perl installed, just follow these 5 simple steps.
Step 1.) Download PHPXref from http://phpxref.sourceforge.net/#download (choose the version suited for your platform).
wget http://prdownloads.sourceforge.net/phpxref/phpxref-0.7.tar.gz?download
Step 2.) Uncompress the downloaded phpxref archive
tar xvpf phpxref-0.7.tar.gz
Step 3.) Navigate to the extracted folder and edit the file named phpxref.cfg. Edit the values for the SOURCE, OUTPUT and PROJECT as needed.

(NOTE: You may need to create the directory for the OUTPUT if it doesn't exist yet to prevent runtime errors during generation as the phpxref script will not create it for you.)
Step 4.) Run the phpxref generation script by invoking the following command:
./phpxref.pl

Step 5.) Once generated, you may now browse the generated documentation in HTML format. If you have set the OUTPUT to point within your Document Root as with our example above, you may browse it using http://localhost/phpxref_sugarcrm or directly in its location since the generated doc is static.

You may automate this process to keep the cross referencing documentation up to date by regularly running phpxref.pl via cron.
5/02/2010
Quick Install Memcached and Memcache for PHP on Fedora
Memcached is a high-performance, distributed memory object caching system. In web applications implementation, it is intended to alleviate database load by caching the most requested data for faster retrieval and lessen DB hits.
Installing Memcached on Fedora and adding it as a PHP module is fairly simple using the console.
Step 1: Install Memcached
yum install memcached
Step 2: Install Memcache PECL module for PHP
yum install php-pecl-memcache
Step 3: Restart Apache
service httpd restart
Step 4: Run the Memcached Daemon
service memcached start
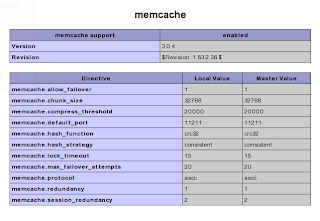
Once finished, you should be able to access memcache-related functions and utilities. You can check the memcache entry in the phpinfo() page which verifies that it has been successfully installed as PHP module.

For more information on how to use the Memcache Class provided by the Memcache PECL module, visit the following link: http://www.php.net/manual/en/book.memcache.php
2010 reset!
Its been awhile since I updated this blog, and there are a few broken links here and there which I will be fixing soon (Sorry). I'll probably add a few more tutorials within the month as soon as I find the time.
I am currently playing around Sphinx and will be posting quick start tutorials about it soon. I also wrote a simple quick-slapped hash-type agnostic reset-password implementation which I will be reviewing for posting (for newbies).
Check back again later. :) //Out
10/07/2009
How to use 3G Phone/Modem to connect to the Internet on Fedora 11 (Linux)
Its been awhile since I attempted to connect to the internet via 3g using my phone (SGH-i550). The last time I did was several months ago with the help of wvdial. Now that there is a power outage in our area; and I forgot to install wvdial; and I just upgraded to Fedora 11, now is the perfect time to test the new features of the updated NetworkManager into action.
The following are the set of simple steps I have taken to connect to the internet using SGH-i550 via 3g on Fedora 11. I would assume that these steps will also work with other brands/models and most 3g modems around.
The following are the set of simple steps I have taken to connect to the internet using SGH-i550 via 3g on Fedora 11. I would assume that these steps will also work with other brands/models and most 3g modems around.
- Connect 3g phone/modem to the computer
- Right-Click on the NetworkManager Applet and select "Edit Connections"

- Select "Mobile Broadband" tab

- Select the 3g Device from the drop down list and click "Forward"

- Select the Country and click "Forward"

- Select a Provider and click "Forward"

- Select a Plan and click "Forward"

- Confirm the details and click "Apply"

- Leave the preset defaults and click "Apply"

- Close the Connection Settings Dialogue

- Right-Click on the NetworkManager Applet again and select the newly created connection

- The NetworkManager Applet will change its icon indicating a successful connection has been established

- And you are done.


Subscribe to:
Posts (Atom)